Whether you're a seasoned pro or just starting out, understanding specificity is crucial for making sure your styles behave exactly as you expect.
Alright, Webflow ninjas, it's time to tackle the beast that is CSS specificity. And to make this as comprehensive as possible, we'll also dive into how Finsweet's Client-First system can help keep your CSS clean and maintainable, and keep that old stylesheet down in size. Now, we’re just a small ‘only’ Webflow studio these days, but we did start out in this game a bit before using Webflow, so we had a pretty good understanding of CSS, but we totally get that a lot of Webflow Designers learn CSS for the first time in Webflow, and there’s nothing wrong with that. Getting to grips with CSS specificity as soon as possible just makes things so much easier for a Webflow developer. But enough of that, let’s just dive right in.
What is CSS Specificity?
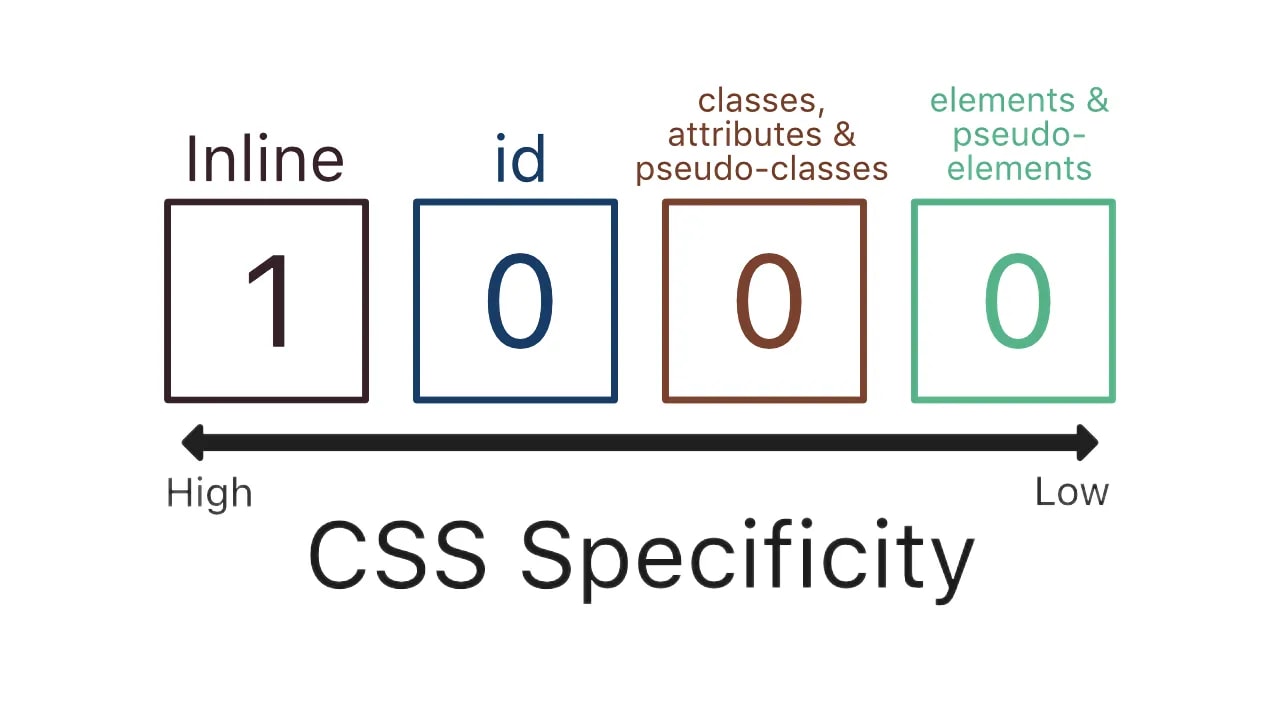
Think of CSS specificity as a point system where different types of selectors contribute different values to the specificity score. The higher the specificity, the more priority the rule has. Here's a breakdown of the specificity hierarchy:
- Inline Styles: 1000 points. These are the most specific.
- IDs: 100 points. Very specific.
- Classes, Attributes, and Pseudo-classes: 10 points each. Moderately specific.
- Elements and Pseudo-elements: 1 point each. Least specific.
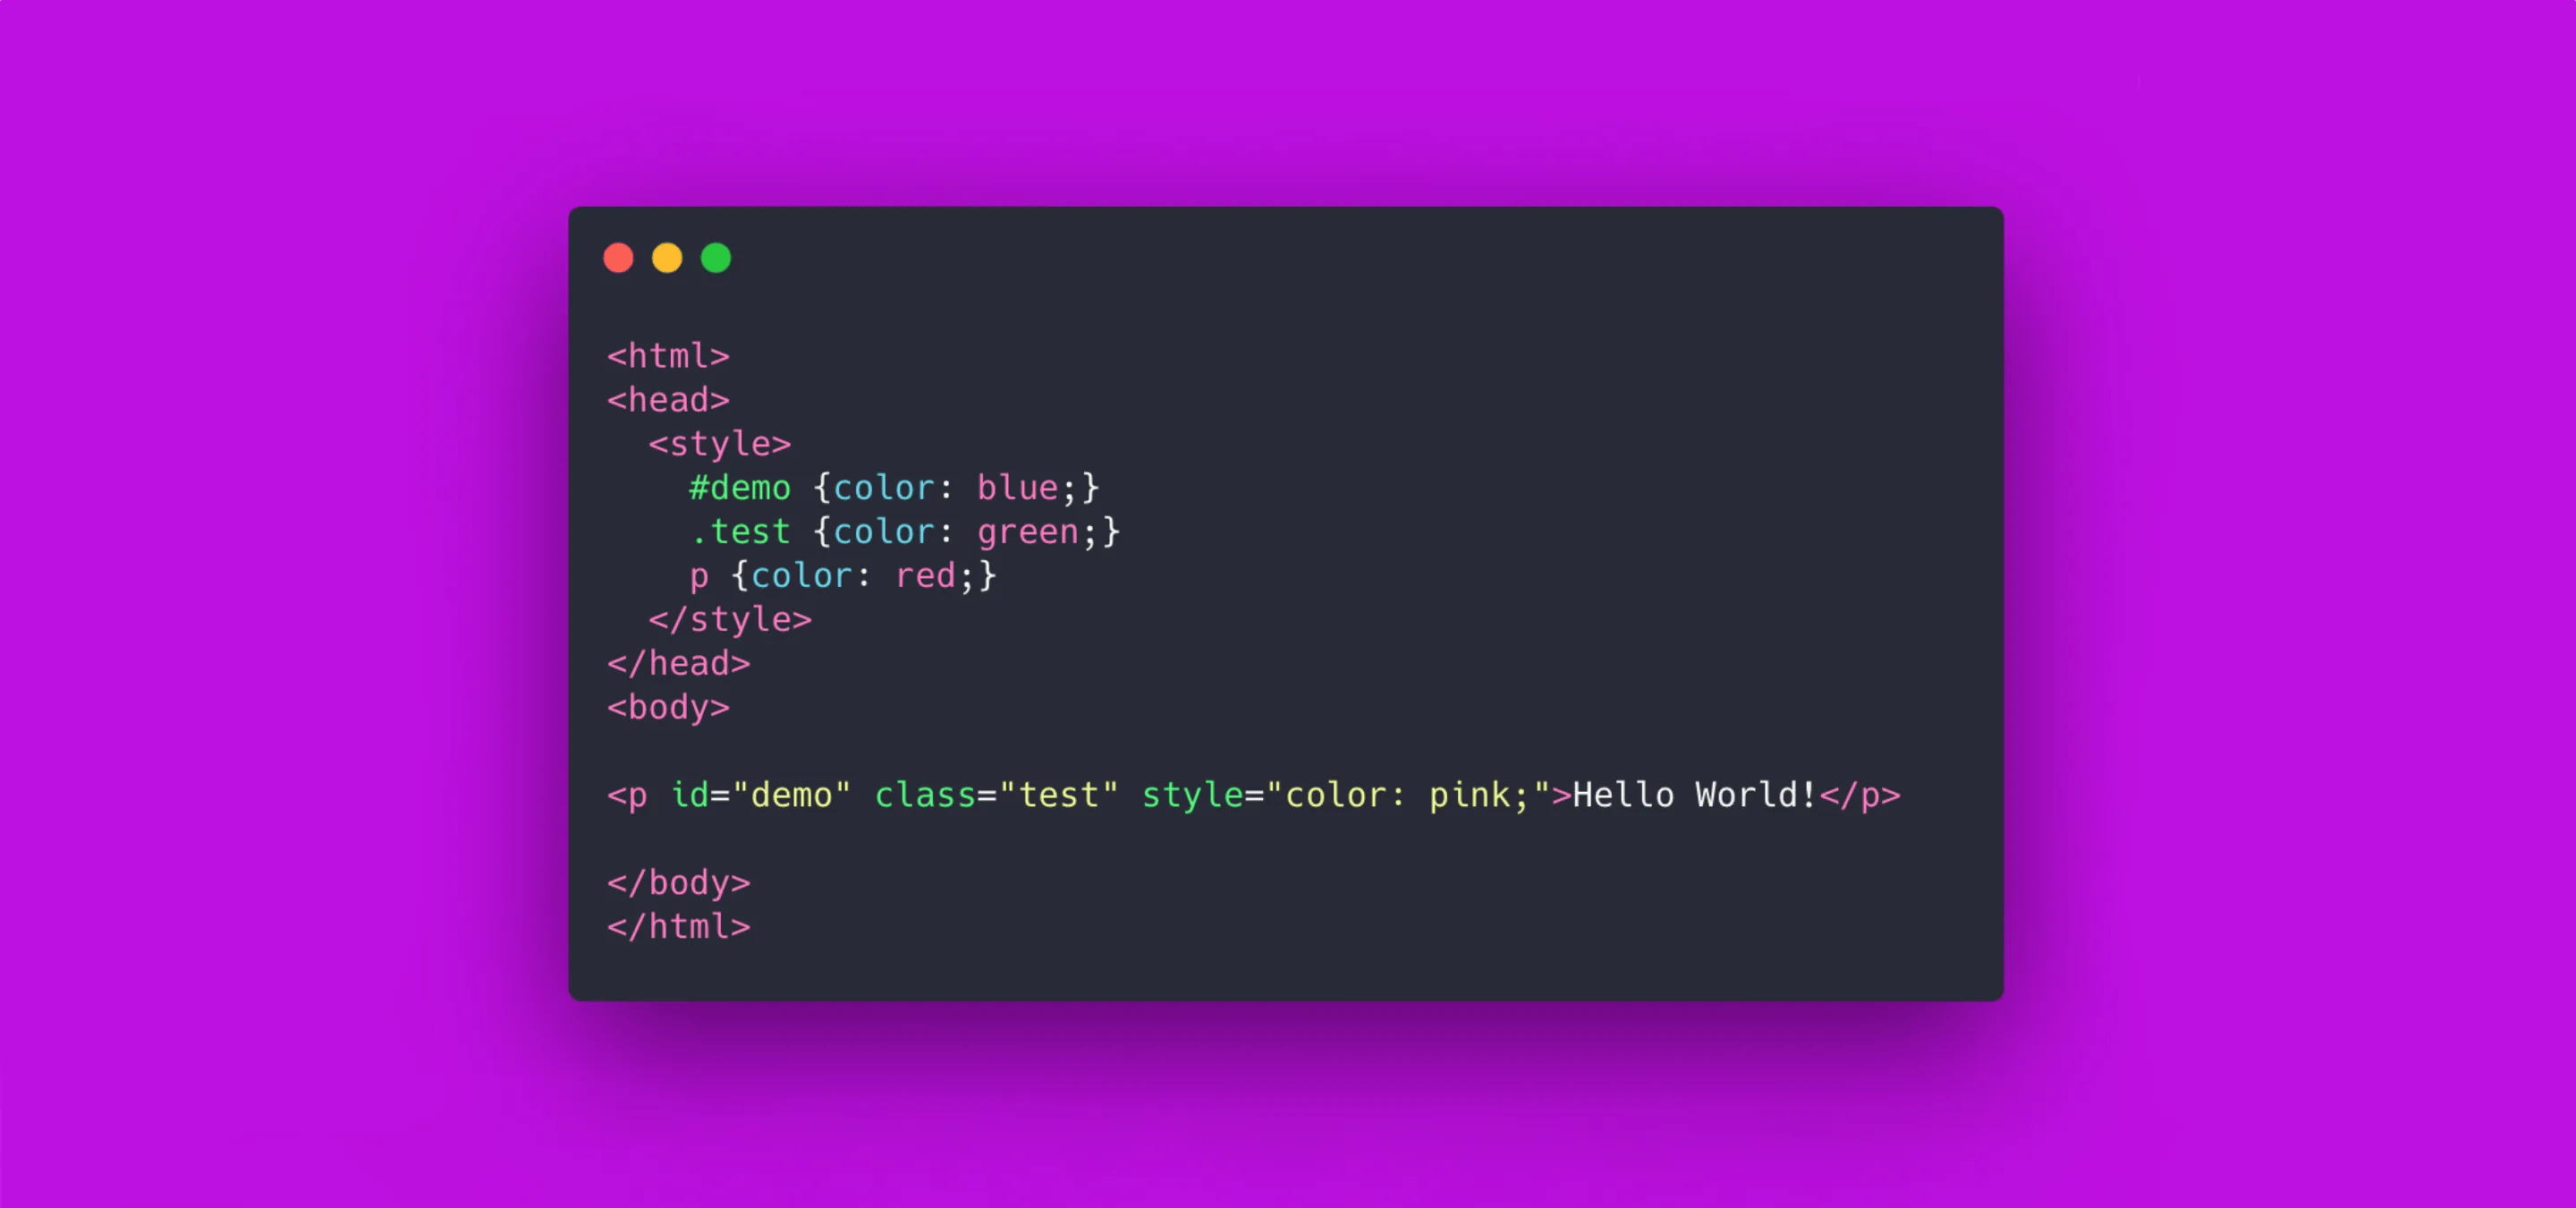
Example Calculation:
#header= 100 points (ID selector)..menu .item= 10 + 10 = 20 points (two class selectors).ul li a= 1 + 1 + 1 = 3 points (three element selectors).
Let's break it down further with more examples to clarify how specificity works in real-life scenarios.
Example 1: Combining Selectors
Consider these rules:
#nav { color: blue; } /* 100 points */
.nav-item { color: green; } /* 10 points */
.nav-item a { color: red; } /* 11 points */
An anchor <!-- fs-richtext-ignore --><a> within an element with the ID #nav and the class .nav-item will be red due to the specificity of 11 points from the .nav-item a selector, which has a higher specificity than .nav-item.
Example 2: Overriding Specificity
Consider these rules:
#content { background-color: yellow; } /* 100 points */
.section { background-color: pink; } /* 10 points */
p { background-color: lightblue; } /* 1 point */
A <!-- fs-richtext-ignore --><p> element within an element with the ID #content and class .section will have a yellow background due to the ID selector's higher specificity.
Specificity in Webflow
Webflow is fantastic for visual web design, but under the hood, it’s all CSS. Understanding specificity can help you debug why certain styles aren’t applying.
Example in Webflow
Consider you have these CSS rules:
#hero { color: red; }
.header { color: blue; }
p { color: green; }
A paragraph inside an element with the ID #hero and class .header will be red, due to the ID selector’s higher specificity.
Expanding on this, let’s look at a more complex example:
#main-content .article h2 { font-size: 2em; } /* 111 points */
.article h2 { font-size: 1.5em; } /* 21 points */
h2 { font-size: 1em; } /* 1 point */
Here, an h2 inside an element with the ID #main-content and class .article will have a font size of 2em.
Webflow Designer
Now, that seems super simple right, of course it is a bit different in Webflow, it’s a visual development platform, so what’s what and where do I see it, and what’s applying to what?
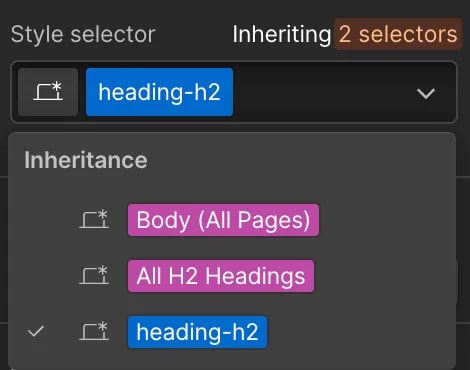
All these questions are completely valid since looking at the element in the designer alone like the image below won’t tell you much aside from the class name.

So what on in the Designer does tell you? First off, we can easily see the structure, which immediately helps us.

But more importantly, we can see exactly what the element is inheriting from when clicking just above the class name on the right of the Designer.
Finsweet’s Client-First System
Finsweet's Client-First system is a game-changer for keeping your Webflow projects organized and scalable. It emphasizes a structured approach to CSS that makes it easy to understand and maintain.
Core Principles of Client-First
- Global Classes: Define broad styles that can be reused across your project.
- Component Classes: Specific to individual components, making styles modular.
- Utility Classes: Single-purpose classes for minor tweaks.
Example:
.global-text-color { color: #333; }
.component-card { padding: 20px; }
.utility-margin-bottom { margin-bottom: 10px; }
Expanding on Finsweet’s Client-First system:
Types of Classes in Client-First
- Utility Classes: Applied globally, for specific CSS properties.
- Example:
.background-color-primary { background-color: #ff0000; }
- Example:
- Custom Classes: Specific to components or elements, often with underscores.
- Example:
header_background-layer
- Example:
- Global Classes: Used across the entire project, ensuring uniformity.
- Example:
.margin-large { margin: 3rem; }
- Example:
Using Combo Classes
Combo classes in Client-First use a base class and add variations with the is- prefix.
- Example:
button is-primary { background-color: #007bff; }
Avoid Deep Stacking
Deep stacking refers to stacking many classes on an element, which Client-First advises against. Instead, use organized, clear class names to maintain readability and manageability.
- Example of deep stacking:
class="text-bold text-large text-center" - Better approach: Use a single, custom class like
.header-text
Practical Tips for Managing Specificity
- Avoid Inline Styles: They have the highest specificity and can override everything else.
- Use ID Selectors Sparingly: These can complicate your CSS if overused.
- Organize Styles Hierarchically: Use systems like Client-First to keep your CSS modular and maintainable.
- Leverage Webflow’s Designer: Visual tools can help you visualize and manage your styles effectively, but it can be hard to rearrange once you’ve started, always clone the Finsweet Client-First Cloneable or others like Relume ig you want to go down that route.
- Use the Finsweet Chrome Extension to reorder: Remember, this is an advanced and you should be comfortable in your understanding of CSS specificity, but the Finsweet extension does allow you to reorder the classes in Webflow.